The holiday season is here, and the best gifts are always the ones you make yourself! This Fast-Finish Quilted Mug Rug is a quick, satisfying project you can complete in an afternoon. It's perfect for using up scraps and making thoughtful, personalized gifts for teachers, neighbors, or colleagues. Follow this step-by-step guide to sew a whole set this weekend!
✂️ Materials You'll Need
This project is designed for scrap-busting, so feel free to mix and match your favorite cotton prints!
One piece, 9 inches x 6 inches
One piece, 10 inches x 7 inches
One piece, 10 inches x 7 inches
One strip, 2.5 inches x 36 inches
🧵 Step-by-Step Instructions
Ensure all layers are pressed smooth before you begin.
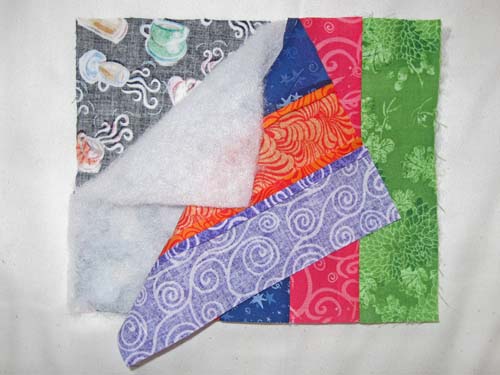
- Lay Out: Place your backing fabric (Fabric 2) face down on your work surface.
- Add Batting: Center the batting piece directly on top of the backing fabric.
- Add Top: Center the mug rug top (Fabric 1) face up on top of the batting.
- Baste: Secure all three layers together using safety pins (spaced every few inches) or temporary basting spray. This prevents shifting during quilting.
The quilting adds necessary texture and structure, binding the three layers permanently.
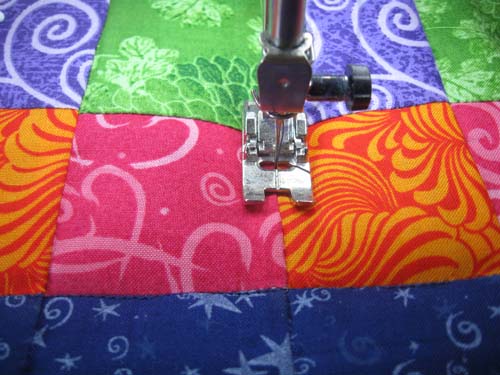
- Choose a Design: For a simple and fast finish, we recommend straight-line quilting using your walking foot.
- Stitching: Start in the center and quilt straight lines every 1/2 inch, moving outward to the edges. You can quilt vertically, horizontally, or diagonally—or get fancy and do a simple grid!
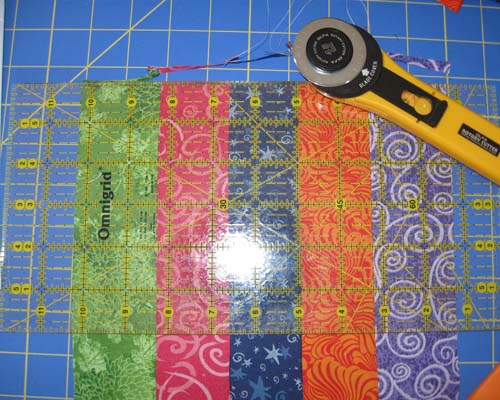
This step ensures clean, professional edges for attaching the binding.
- Find Your True Edges: Place your ruler on the quilted piece and align it with your quilting lines. Trim one edge to establish a straight line.
- Square Corners: Rotate the piece and use the newly trimmed edge to ensure the next cut is perfectly square (90 degrees). Trim all four sides.
- Final Size: Your final mug rug should measure exactly 8.5 inches x 5.5 inches.
The binding finishes the raw edges and provides a clean frame for your work.
- Prepare Binding: Take your 2.5-inch strip of binding fabric and press it in half lengthwise.
- Attach to Front: Starting along the center of one edge, align the raw edge of the binding strip with the raw edge of the mug rug top. Use a 1/4-inch seam allowance to sew the binding to the front of the mug rug, mitering the corners as you reach each turn.
- Finish to Back: Fold the binding over the raw edge to the back of the mug rug. Secure it by hand stitching (for a classic look) or by machine stitching (for a quick finish).
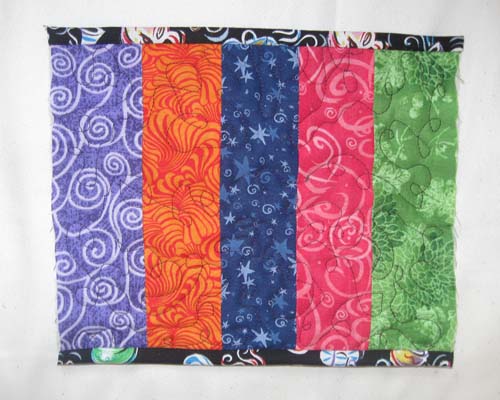
🎉 You're Done!
Congratulations! You've created a beautiful, handmade gift in no time. Place a fun ribbon around it, attach a tag with a tea bag or coffee packet, and you have a thoughtful present ready to go.
Want to make a matching set?
We have a whole collection of quick-finish patterns that perfectly coordinate with this Mug Rug for an impressive gift set.
Shop Coordinating Gift Patterns